
I have had the Simplicity patterns for that outrageous Marie Antoinette type court gown and underwear for ages now. I had planned to use that and just make this as a costume. Then the more I looked into it and thought about it, I realized I was making this gown for myself as a project and not just to wear to events. The fact is, I have no place at all to wear this to. So I decided to make it for the love of the project instead and then I decided that I wanted a reasonable amount of accuracy to it.
I knew I needed to start from the inside out - I can't make a fancy gown without the proper undergarments to wear with it. This means I have to begin by making the stays, chemise and panniers, and while the pocket doesn't need to come now, I figure I'll work on that too.
So the stays it is! Arguably the most important and most difficult piece I will make for this gown. I began by assembling my materials.


This is an assortment of materials that I am absolutely in love with. I'm using Gutterman 100% silk thread, silk ribbon in taupe from May Arts, hand dyed silk embroidery threads by Alyce Schroth purchased from my favorite embroidery shop - Hedgehog Hand works. The 100% linen is from Fabrics-store.com in a softened version for the outside and a heavier bleached version for the inner lining.

I decided that I wanted a more accurate style than the Simplicity stays offered, so I went with the Reconstructing History pattern. I'm not 100% happy with it, but will withhold final judgement until I finish the project.

I have the 2 layers of inner lining all drawn out and partially cut at this point. I used a Crayola Washable fine tip marker for the outlines. They are cheap, work fantastic, and I have never had an issue with them not washing out. I highly recommend ditching those expensive fabric markers that don't work and using Crayola WASHABLE markers instead!

I have begun to mark out the stitching lines for the boning. I'm using 1/4 half oval reed as boning, but it hasn't arrived yet. I made sure to mark off a bit of the seam allowances to make sure I know where everything is going. I decided that because I am hand stitching this whole thing I wanted to make it very nice for myself. I really wanted to add some embroidery to it - even if in a manner not historically accurate.

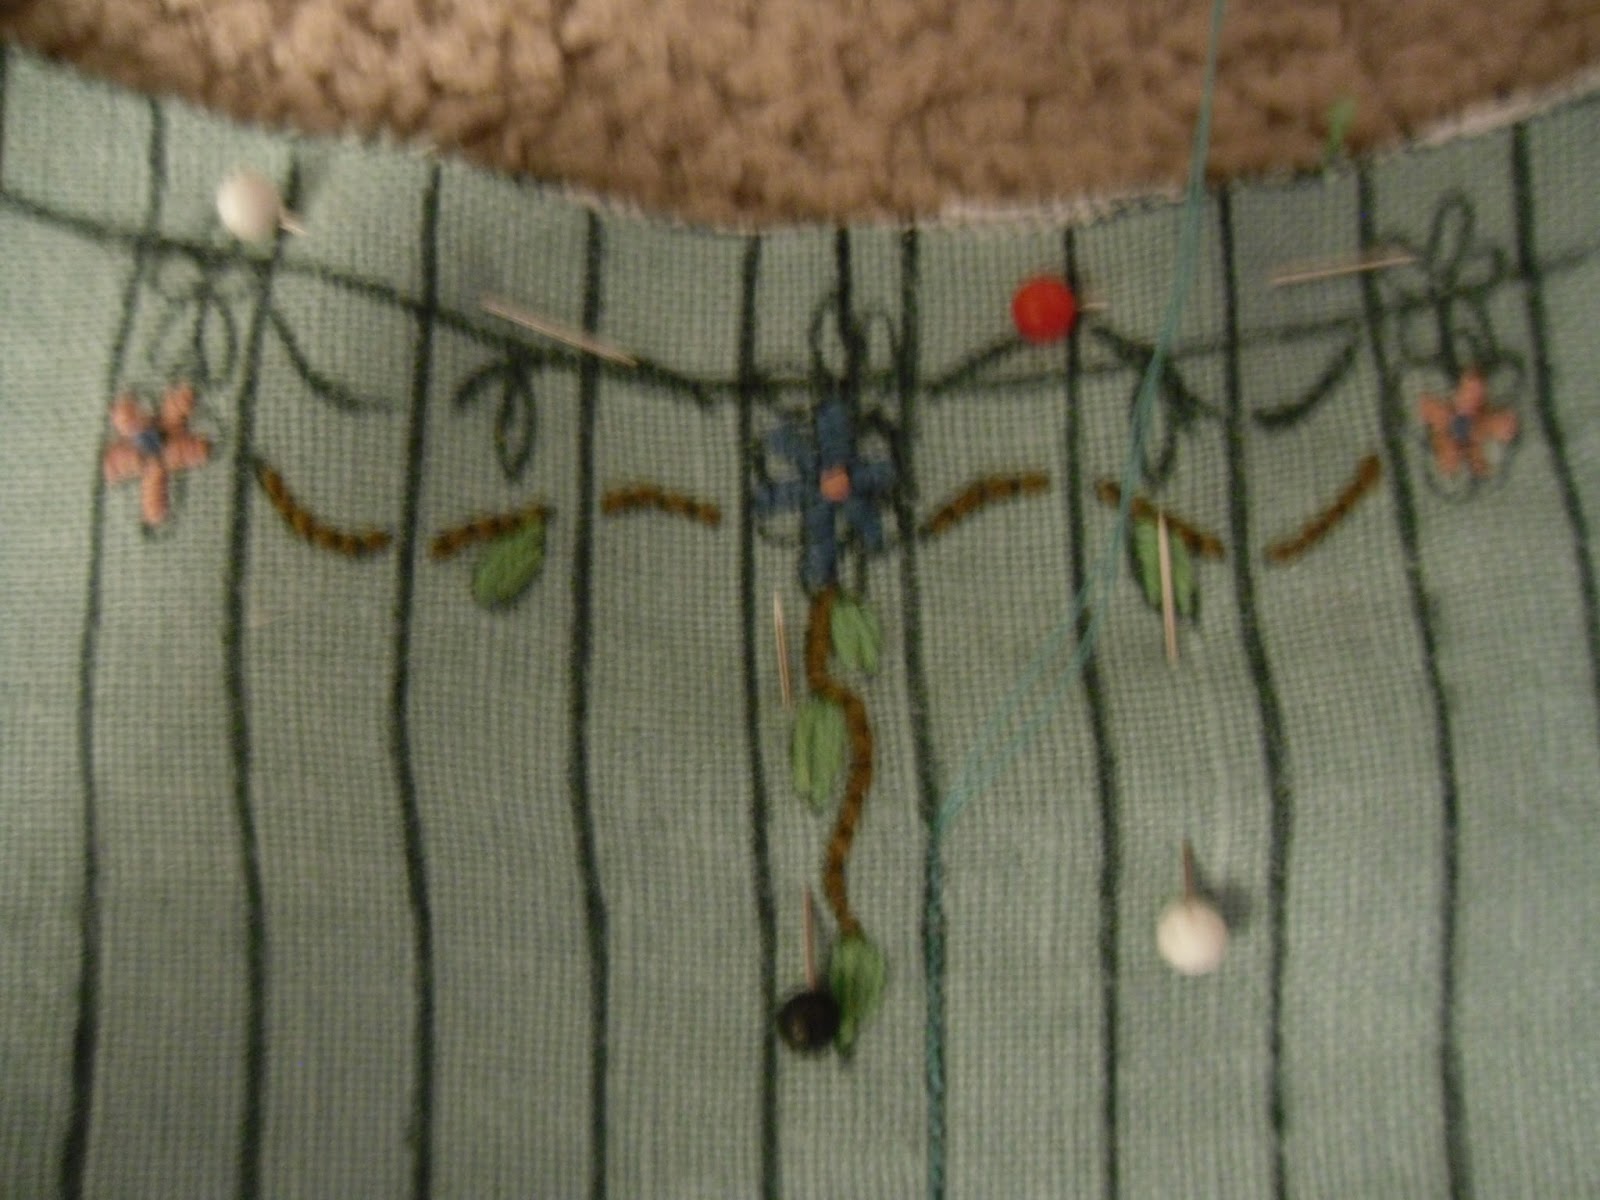
I decided on a simple vine with leaves, grape/berry clusters and small flowers. You can see where I have drawn out the patterns. Along the back I've decided to embroider the bone channel on the inside of the channel that will hold the eyelets.

More of the pieces drawn out with the embroidery designs added. I'm putting the vines on each of the tabs at the bottom. You can see that I decided to put the matching design on the shoulder straps that will not be boned.

I am leaving a section about an inch and a half at most under the arms unboned. This should help make the stays more comfortable. I have decided to make use of this blank space and add more embroidery there.

I'm working in bits and pieces assembling this, here I have begun work on the shoulder strap embroidery. You can see at the bottom end of the strap where I drew the design and forgot to add in the seam allowance so I had to go back over it. Luckily (I HOPE!) the washable marker should come right out when the times comes. Because of the silk threads I hope for that to be the one time I will be getting these stays wet.

This center pieces is the farthest along. I have finished the simple embroidery and begun to hand stitch the channels for the boning.

So - here it is in all its time consuming glory - a very strong backstitch. I will regret the teeny tiny stitch size at a later date when I am still sewing a year from now - but when it is done I am sure I will be quite proud!

A ruler for an idea of just how many stitches I am cramming into an inch. Last I counted it was something like about 20 stitches to the inch. OUCH! At this point I sort of wish I'd have gone with silk for the outside fabric, but I just LOVE linen so much, so I will be fine with it.
The upper edge, again, note where I had to redraw the design to account for the seam allowance. You can also see the thread and needle off to the side where I am nearly done stitching the first line for the boneing channels.

This is the front bottom point. I'm very fond of the design.

A slighty blurry photo of the back side of the stitching.

The backside. The channels are sewn with the inner lining and the actual lining that will go against the body will be separate.

I am very much in love with this sea green linen and the taupe silk ribbon together. I will be binding the edges with this ribbon as well as using it for the shoulder strap bows. I have a much smaller size of the ribbon to tape the seams in an appropriate fashion.

This is my current 18th Century reference library. Love all these books.

This is an extant garment. The tiny hand stitches of this are what inspired me to make mine so fine.
I am AGES away from completion on this project but little by little they will take shape!
No comments:
Post a Comment