Welcome - to the procrastination and insanity ~

Hello, there! I'm Kari and he (points to man playing with a pet hedgehog nearby) is my husband Randy. He dabbles in the SCA (society for creative anachronism) when he has the time and money. I have always been crafty and enjoyed history, so we're combining forces to create and continue to improve a Viking persona. This blog will be where I can recount my various misadventures in such things as embroidery, sewing, tablet weaving, nalbinding, cooking, etc. This will allow interested parties to follow my progress on projects, offer help, feedback and also learn from my mistakes. I will also include projects my husband and I will work jointly on, such as our Viking tent, bed and eventual other encampment items. I may, from time to time, add in my husbands related misadventures into armour making and the like. So, let the insanity begin!

Friday, July 26, 2013

Nalbinding SOCKS!

These are an old project and unfornatley I don't have any pictures of how I made them, but someday I will be making a pair for my husband and I will try to remember to document that process.

I hopped onto the nalbinding train before it reached its current speed within the SCA. It seems like lately everybody is nalbinding up a storm! When I began though it was very difficult to find somebody to teach me as well as to find information online without dropping a lot of money on books.

I did find an old handout from an SCA event that detailed the Oslo stitch and I taught myself that stitch and went from there, sort of making it up as I went. I'm good at that.

Along the way by far the most helpful website I found with information is http://www.en.neulakintaat.fi/ This Finnish website is fantastic! I used the way to make socks detailed there and just hoped of the best. There is always room for improvement, but I am very happy with my socks. They are slightly loosely nalbound because I used  lightweight wool yarn. They are still very cushy and warm but breath wonderfully during the hot summer SCA events.

I also have made hats and mittens, using the instructions give at that website. It is great. I HIGHLY recommend it.

When I made these I started at the top, making sure the loop I made was large enough to fit over the largest part of my foot - being the diagonal from heel top of ankle. Because there is some stretch to these the top of the sock does fit that angle. This is VERY important. If you make the tops too small you wont be able to get your socks on!

From there I made several rows and just kept trying it on as I went. I went down as far as I wanted the top/cuff to go and then stopped. I then added on the heel part, working it down tightly making sure it fit my foot as I worked. Lastly all I had to do was add on as many rows, growing slowly smaller as was necessary to fit the length of my foot. Making the socks in this manner it was very easy to make sure they fit  me! 

This is the toe of my sock. You can see how much denser it is as I took up more stitches to decrease the size until at the very tip it is all worked together and the last few stitches are tied off. 

Here you can see the work where the heel breaks off and if you look closely and follow the rows you can see where the breaks happen and how the heel is its own cup portion worked onto the back of the sock. 

When they are on while there is plenty of stretch to the work they do not have huge holes. 

The band around the top was inspired by a viking age find. The original did not have this high of a cuff and had a red band at the top. I liked the idea of a plain sock with just a band of color at the top. You can see how nicely these socks fit my feet, even conforming to the arch. It was actually quite easy to do, I just worked row by row fitting as I went. You can see along the side the places where I took up stitches to gradually make the sock smaller going towards the toes. 


I didn't get my boots until  later, but I am so glad that I made my socks tall enough! I wanted them to be able to stick out the top of my boots. The reason is two fold. I wanted them to cushion my ankles from the leather rubbing against them and I wanted that band of color to show! I accomplished everything I wanted to with these socks. The boots are from Viking Leather craft and for the cheap cost they are worth it to have semi period accurate foot wear. These are not turn sole, though they do offer them as well, which would be accurate. 

Now go make yourself some viking socks! 

Viking cap in wool with wool tablet woven trim UPDATE

I was looking through my old posts and realized I don't have much follow through on updates! I begin these projects and let the internet know, but when I finish them I never tell more!

Well the viking cap has been in use by my husband for a few years now. He loves it. It was one of his Christmas presents years ago and he still regularly uses it. I even made him a nalbound hat more recently (Oh geez! SO MUCH to tell!) but he still won't wear it and instead always wear this one!

In the end I hand stitched all the seams with linen thread and it turned out to our liking.


This is a very simple tablet woven trim. It is in a chunky wool and worked up SUPER fast. 

You can see the slight contrast stitching. This was done on purpose and is seen in historic viking age garments. 

Nice close up of the stitching and weaving. 


The inside of the hat. You can see where the trim has been hand stitched in place and also how I turned over the inside seams and then secured them with the decorative and practical stitch in a contrasting color. This finishing is found on some viking age garments. 


If you followed the old hat post you should recognize that hat there on his head! The vikings were more bright and bold that we are in our garb but we like our colors, even if they might be a bit too matchy matchy for viking tastes. 

I'll have to update later with instructions on our tent, more about our finished viking bed as well as all the garb pieces I have made for us. 

A Viking Hedgehog!

Just for fun I found this toy Playmobil "Viking" helm. It looked about the right size for our hedgehog Thistle Fluff.


Yes! I know the vikings didn't have horns, but you have to admit, she makes an adorable Viking Hedgehog! 

18th Century garters - Doctor Who style!

To go along with my 18th Century project I will need garters, OF COURSE! How else would my stockings stay up? Certainly not with elastic! I did some looking at some extant garments and decided my favorites where the ones that had an embroidered panel that is then tied with a ribbon. Amongst these my favorites were the 'motto' ones. 

I spent quite a bit of time trying to come up with a motto that I liked well enough to put on my garters. I was watching my favorite show, Doctor Who and happened to be re-watching The Girl in the Fireplace. This episode features Madame De Pompadour and the 10th Doctor, David Tennant. Along with the drool worthy Doctor there were some beautiful costumes, even if they weren't all accurate. 

Madame De Pompadour comes to the conclusion that along with the Doctor come the monsters. You cannot have one without the other. She tells Rose Tyler that "One may tolerate a world of demons, for the sake of an angel," referring to the Doctor as an angel. I feel in love and decided this had to be my motto!

So I decided on this geeky motto that only a Who fan would possibly recognize. Then I mulled over putting it in French but in the end decided to go with English to show off (OH MY! Not my garters!) my geekiness. 


Everything decided I sketched out my design. One garter will read "One may tolerate a world of" and the other "demons for the sake of an angel." 


Next step was to assemble ingredients - I mean materials! I am using a SUPER SOFT white 100% linen from JoAnns. I find this linen softer than that from fabrics-store.com. I'm also using this white linen for my pockets and the lining for my stays because it is soooo soft. I am using Kreinik silk to embroider. 

I purchased this delicious hand dyed ribbon from Hedgehog Handworks. It is Gloriana ribbon. It is wonderfully lustrous and soft. I'm using a great gold color. 


My assortment of Kreinik silk floss I am using for this project. My stays will be a bit dark in color as will my gown (I'm sure) so I wanted these garters to be a bit happy and bright. 


My design is hand drawn with Crayola washable maker. I have begun the embroidery and am very happy with it so far. 


I still have a long way to go! 


18th Century Stays

Sooo the Viking Hedgehog is stepping out of the 800's! This isn't an SCA related project because it falls outside of the acceptable time period. I have had a love of 18th century clothing since I was a little girl and had the colonial American Girl doll, Felicity. I found her a while ago when I was going through some old things from my childhood and fell in love with her wardrobe all over again.

I have had the Simplicity patterns for that outrageous Marie Antoinette type court gown and underwear for ages now. I had planned to use that and just make this as a costume. Then the more I looked into it and thought about it, I realized I was making this gown for myself as a project and not just to wear to events. The fact is, I have no place at all to wear this to. So I decided to make it for the love of the project instead and then I decided that I wanted a reasonable amount of accuracy to it.

I knew I needed to start from the inside out - I can't make a fancy gown without the proper undergarments to wear with it. This means I have to begin by making the stays, chemise and panniers, and while the pocket doesn't need to come now, I figure I'll work on that too.

So the stays it is! Arguably the most important and most difficult piece I will make for this gown. I began by assembling my materials.


This is an assortment of materials that I am absolutely in love with. I'm using Gutterman 100% silk thread, silk ribbon in taupe from May Arts, hand dyed silk embroidery threads by Alyce Schroth purchased from my favorite embroidery shop - Hedgehog Hand works. The 100% linen is from Fabrics-store.com in a softened version for the outside and a heavier bleached version for the inner lining. 

I decided that I wanted a more accurate style than the Simplicity stays offered, so I went with the Reconstructing History pattern. I'm not 100% happy with it, but will withhold final judgement until I finish the project. 

I have the 2 layers of inner lining all drawn out and partially cut at this point. I used a Crayola Washable fine tip marker for the outlines. They are cheap, work fantastic, and I have never had an issue with them not washing out. I highly recommend ditching those expensive fabric markers that don't work and using Crayola WASHABLE markers instead!


I have begun to mark out the stitching lines for the boning. I'm using 1/4 half oval reed as boning, but it hasn't arrived yet. I made sure to mark off a bit of the seam allowances to make sure I know where everything is going. I decided that because I am hand stitching this whole thing I wanted to make it very nice for myself. I really wanted to add some embroidery to it - even if in a manner not historically accurate. 

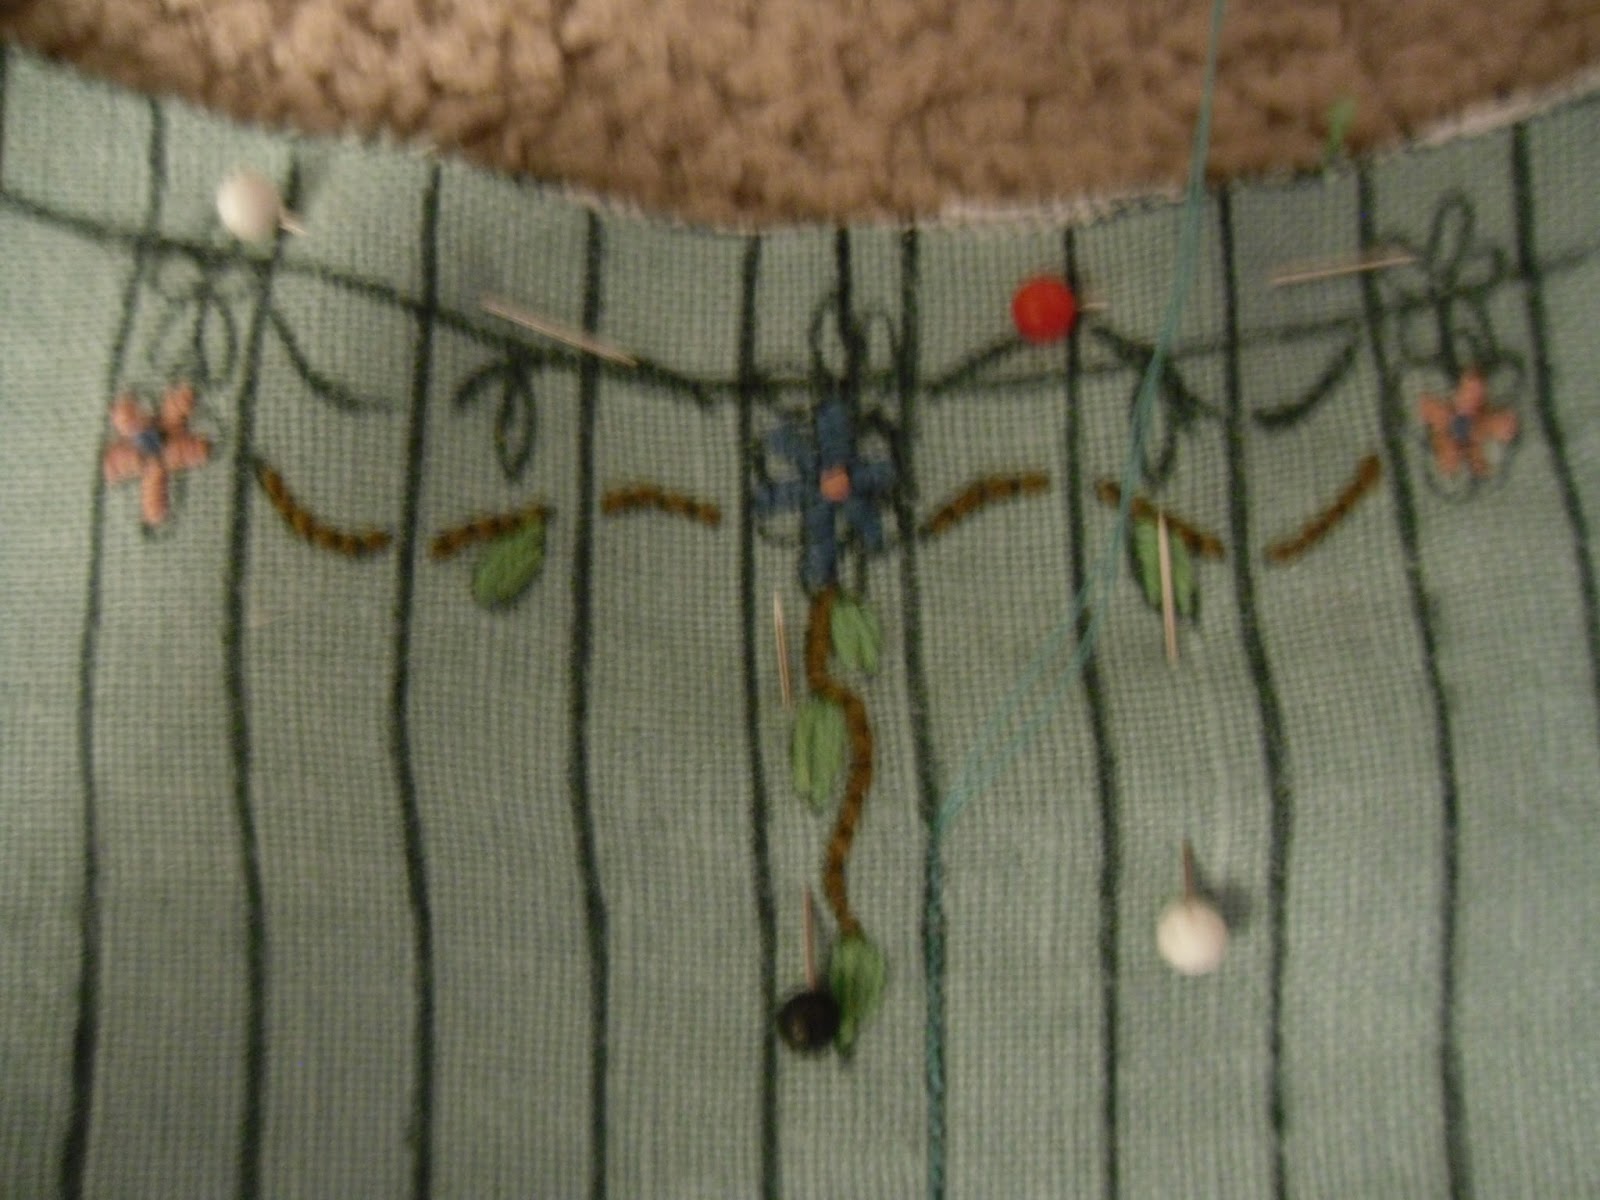
I decided on a simple vine with leaves, grape/berry clusters and small flowers. You can see where I have drawn out the patterns. Along the back I've decided to embroider the bone channel on the inside of the channel that will hold the eyelets. 


More of the pieces drawn out with the embroidery designs added. I'm putting the vines on each of the tabs at the bottom. You can see that I decided to put the matching design on the shoulder straps that will not be boned. 


I am leaving a section about an inch and a half at most under the arms unboned. This should help make the stays more comfortable. I have decided to make use of this blank space and add more embroidery there. 


I'm working in bits and pieces assembling this, here I have begun work on the shoulder strap embroidery. You can see at the bottom end of the strap where I drew the design and forgot to add in the seam allowance so I had to go back over it. Luckily (I HOPE!) the washable marker should come right out when the times comes. Because of the silk threads I hope for that to be the one time I will be getting these stays wet. 

This center pieces is the farthest along. I have finished the simple embroidery and begun to hand stitch the channels for the boning. 


So - here it is in all its time consuming glory - a very strong backstitch. I will regret the teeny tiny stitch size at a later date when I am still sewing a year from now - but when it is done I am sure I will be quite proud! 

A ruler for an idea of just how many stitches I am cramming into an inch. Last I counted it was something like about 20 stitches to the inch. OUCH! At this point I sort of wish I'd have gone with silk for the outside fabric, but I just LOVE linen so much, so I will be fine with it. 


The upper edge, again, note where I had to redraw the design to account for the seam allowance. You can also see the thread and needle off to the side where I am nearly done stitching the first line for the boneing channels. 

This is the front bottom point. I'm very fond of the design. 

A slighty blurry photo of the back side of the stitching. 

The backside. The channels are sewn with the inner lining and the actual lining that will go against the body will be separate. 

I am very much in love with this sea green linen and the taupe silk ribbon together. I will be binding the edges with this ribbon as well as using it for the shoulder strap bows. I have a much smaller size of the ribbon to tape the seams in an appropriate fashion. 


This is my current 18th Century reference library. Love all these books. 


This is an extant garment. The tiny hand stitches of this are what inspired me to make mine so fine. 


I am AGES away from completion on this project but little by little they will take shape! 

Tuesday, July 24, 2012

Viking Hedgehog

Just a quick post. I still have ages of updates to do. There is a lot going on with the "brewery." We also have updates on tons of garb and also our viking tent and viking bed. So many things in the works.

We have adopted the name "Viking Hedgehog" for our general brand of works and a hedgehog has been our emblem. I have just been using a simple line design, such as on Randy's shield that I painted. Needless to say, this has seemed a bit out of the taste of the "vikings."

They had a style and art all their own and it seemed only appropriate that eventually we would have a viking style hedgehog to use as decoration. I have been meaning to try my hand at this for ages and been putting it off.

I recently purchased the Dover publishing "Viking Designs" and also "Celtic and Old Norse Designs" books, which, I highly recommend. They are great references to have on hand, for their price. I looked through them for inspiration, and highly drew from the angles and shapes in a horse carving listed as being the "design on a viking rune stone. St. Paul's Churchyard, England."

I am no scholar on the various types of viking design, I do see the differences, but am not knowledgeable or adept enough at any to identify or to create a design that solidly sits in any one style. That said, I am fairly happy with my sort of prototype "viking hedgehog." I will likely keep tweaking and as I learn more and study more of the viking age art I can create a cohesive style.

For now I won't call it Borre, Jellinge, Mammen, Ringerike, Urnes or Broa/Oseburg. Though, in actuality, it is unlikely that a hedgehog would have ever been the subject of viking art in the first place.

 I will be happy with my generic, fantastical, viking hedgehog.


Sunday, March 4, 2012

Viking Bed

Well, the hubby and I have been talking about it for years, and we finally decided it was time. We have been talking about making a "Viking" bed for years. Something to get us up off  the cold, hard ground at camping events. I began with plenty of research and decided that the simple four post style from the Gokstad find would be good for our purposes.


I found many different reproductions using a variety of number and type of slats, but I decided to stay true to the original, at least in that respect, and use 7 slats in the bed. I decided that, because it provided a shopping list, the plans found here would be the easiest to try to follow. I did come across a few errors that appear to be present in the plan drawings, but if you are careful and double check everything, it is easy enough to follow these directions. We decided to make a bed to take a full size mattress. So the box needed to be 54x75 inches on the inside. 

So, research mostly out of the way, it was time to buy materials and get a move on. My husband and I live in a townhouse and so do not have an area to work on a project as big as this, so I enlisted my dad's help. I asked him if he was up for a father/daughter project to work on during the weekends. He agreed. 

Thus, the shopping began! Even though many of the bed "reproductions" found on online for SCA events have been made entirely from pine, my dad had issues with this. He really thought we should use a nice hardwood, so we decided to look into Oak. Menards had a sale on their select hardwood boards, 10% off and extra 11% off mail in rebate, so we went and got our shopping out of the way.

After a ton of figuring and math we decided to make the box out of oak, and purchased 2 boards 1x6x12 feet. We determined we could get the side rails, end rails and middle slat out of the two boards. We went to buy the posts, and while the directions we were going off of called for 3x3's, due to how difficult they are to find, we just went with 4x4's instead, adjusting the lengths of the other boards accordingly. Planning to use the nice oak, I quickly decided that at around $35 for a board to get two posts out of, the oak wasn't worth the price. The oak 4x4's offered were made of lots of small pieces of lower quality oak that had been glued and pieced together and then sandwiched between two nice boards. I just wasn't happy not using a SOLID piece of wood for my posts, even if was still all oak. 

On to plan b! There were some nice Douglas Fir 4x4's that were 12 feet long that would give us plenty to cut the 4 posts out of, at about a quarter of the price, and the wood was a solid piece. This just left us with the remaining 6 slats needed. I finally convinced my father that with the stability of the oak side rails and middle slat, we would be fine using cheap pine for the remaining slats. My husband and I combined weigh around 250 lbs. so breaking furniture isn't usually an issue for us. The cheap pine was purchased in 1x6 by 12 feet pieces (3 boards, to be cut into 2) for less than $5 a board. 

That makes our total shopping list:
(2) 1x6 boards 12 feet long
(1) 4x4 board 12 feet long
(3) 1x6 board 12 feet long

I would list the measurements we used to cut everything down right now, but I left my plans at my fathers garage so I will have to update later. At any rate - we started work on March 2, 2012. Here are some pictures of what we got done on the first day. Sorry for the quality, these were taken on my phone. 


Here my dad is adjusting the saw so it can cut the 4x4. 


I am cutting one of the 1x6 boards into the length we needed for the slats. 


Here are the boards for the posts. The one on the right isn't cut to size yet. We left these rather long, because were hadn't decided yet on how tall we wanted the posts to be. 

Here are the oak boards, you can see on the left the side rails and the end rails and then on the right is the middle slat. 


I think better visually when I can see everything all laid out, so I did some drawing on a piece of scrap so I could see just what the ends of the side rails would need to be cut like. 


Here my dad is using the tool the mortising tool he purchased for the job. It is a Dewalt tool (don't know the number, sorry) and did not fit his very old saw that converts to a drill press. He had to do a lot of finiking to make it work, but in the end, it works! However, I do not really condone this sort of behavior, as it could be quite dangerous. If a attachment doesn't fit a tool, then it shouldn't be used. There is no stopping my dad though. 


Here is the first cut into some scrap from the posts. 


Here is the marks I drew on the posts to show where to cut. Yes, there are extra lines there, but I wanted to be 100% sure everything was lining up properly on each post so everything would be level and correct. 


Here is my dad putting the mortises into the first of the bed posts. 


The cut made by the tool into the scrap wood.


 The partially finished mortises on the bed post. 


Unfortunately we didn't get a ton done that day, because I work 3rd shift so I got very sleepy around 3pm and had to get home to bed. Making the mortising tool fit the drill press took a good long time, but while he was doing that I did get all the cuts marked out on everything and the math pretty well all sorted out. 

So, there's day one of the Viking bed! We aren't on any time crunch because we won't need the bed until the end of June for Baron Wars. More as it is finished!